1. Introduction
This article is for users with Admin access. It covers how you grant and manage access permissions for individuals and teams, and how you configure the settings of an organization. To set permissions for other accounts, you must hold Admin access.
2. Setting and Managing Access Permissions
As an administrator, you decide who can access the organization's data and at what level. You manage access from the Permissions sub-tab, which has two sections: User Permissions and Team Permissions. In the User Permissions section, you grant access to one account at a time; this is called individual, or personal, access. In the Team Permissions section, you grant the same access to every member of a team at once; this is called team access. Before granting access, it helps to understand how permissions behave across the data structure.
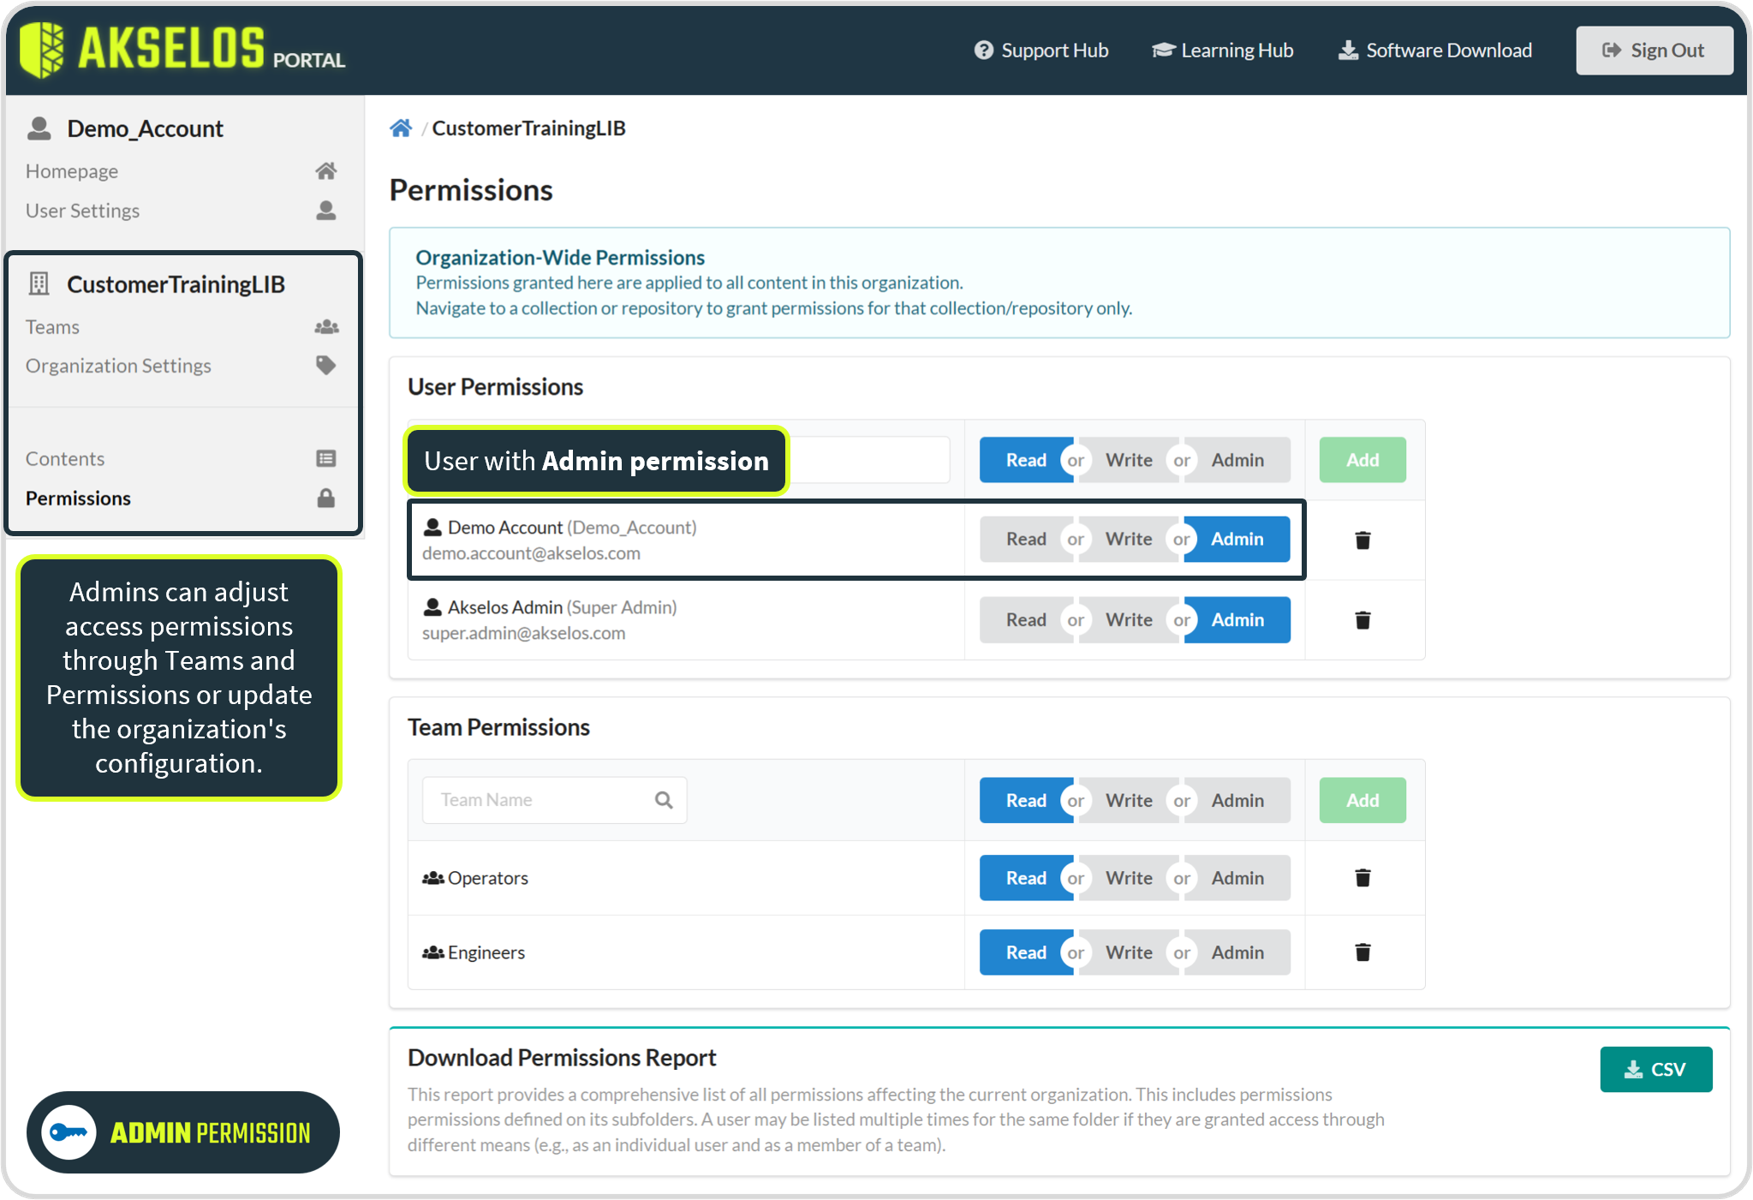
Figure 1. The Permissions sub-tab with the User Permissions and Team Permissions sections
2.1 How Permissions Work
Two rules govern every permission you set.
- Permissions are inherited downward. A permission granted at a higher level flows to everything beneath it. Granted at the organization level, the permission applies to the entire organization, including every folder, repository, and collection it contains. Granted on a specific folder, repository, or collection, the permission applies only to that location and the items beneath it. For example, Write access on a folder gives Write access to every repository, folder, and collection inside it.
- The highest permission applies. A user can receive access both as an individual and through a team, and the two can differ. When permissions overlap on the same location, the user receives the highest of the two. For example, John Doe belongs to the team Structural Engineers, which has Admin access to the Hull Assessment folder. John Doe also has an individual Read permission on the same folder. Because Admin is the higher permission, John Doe holds Admin access to the Hull Assessment folder.
2.2 Setting Permissions for Individual Accounts
When adding an account, you choose the access level at the same time, then add the account.
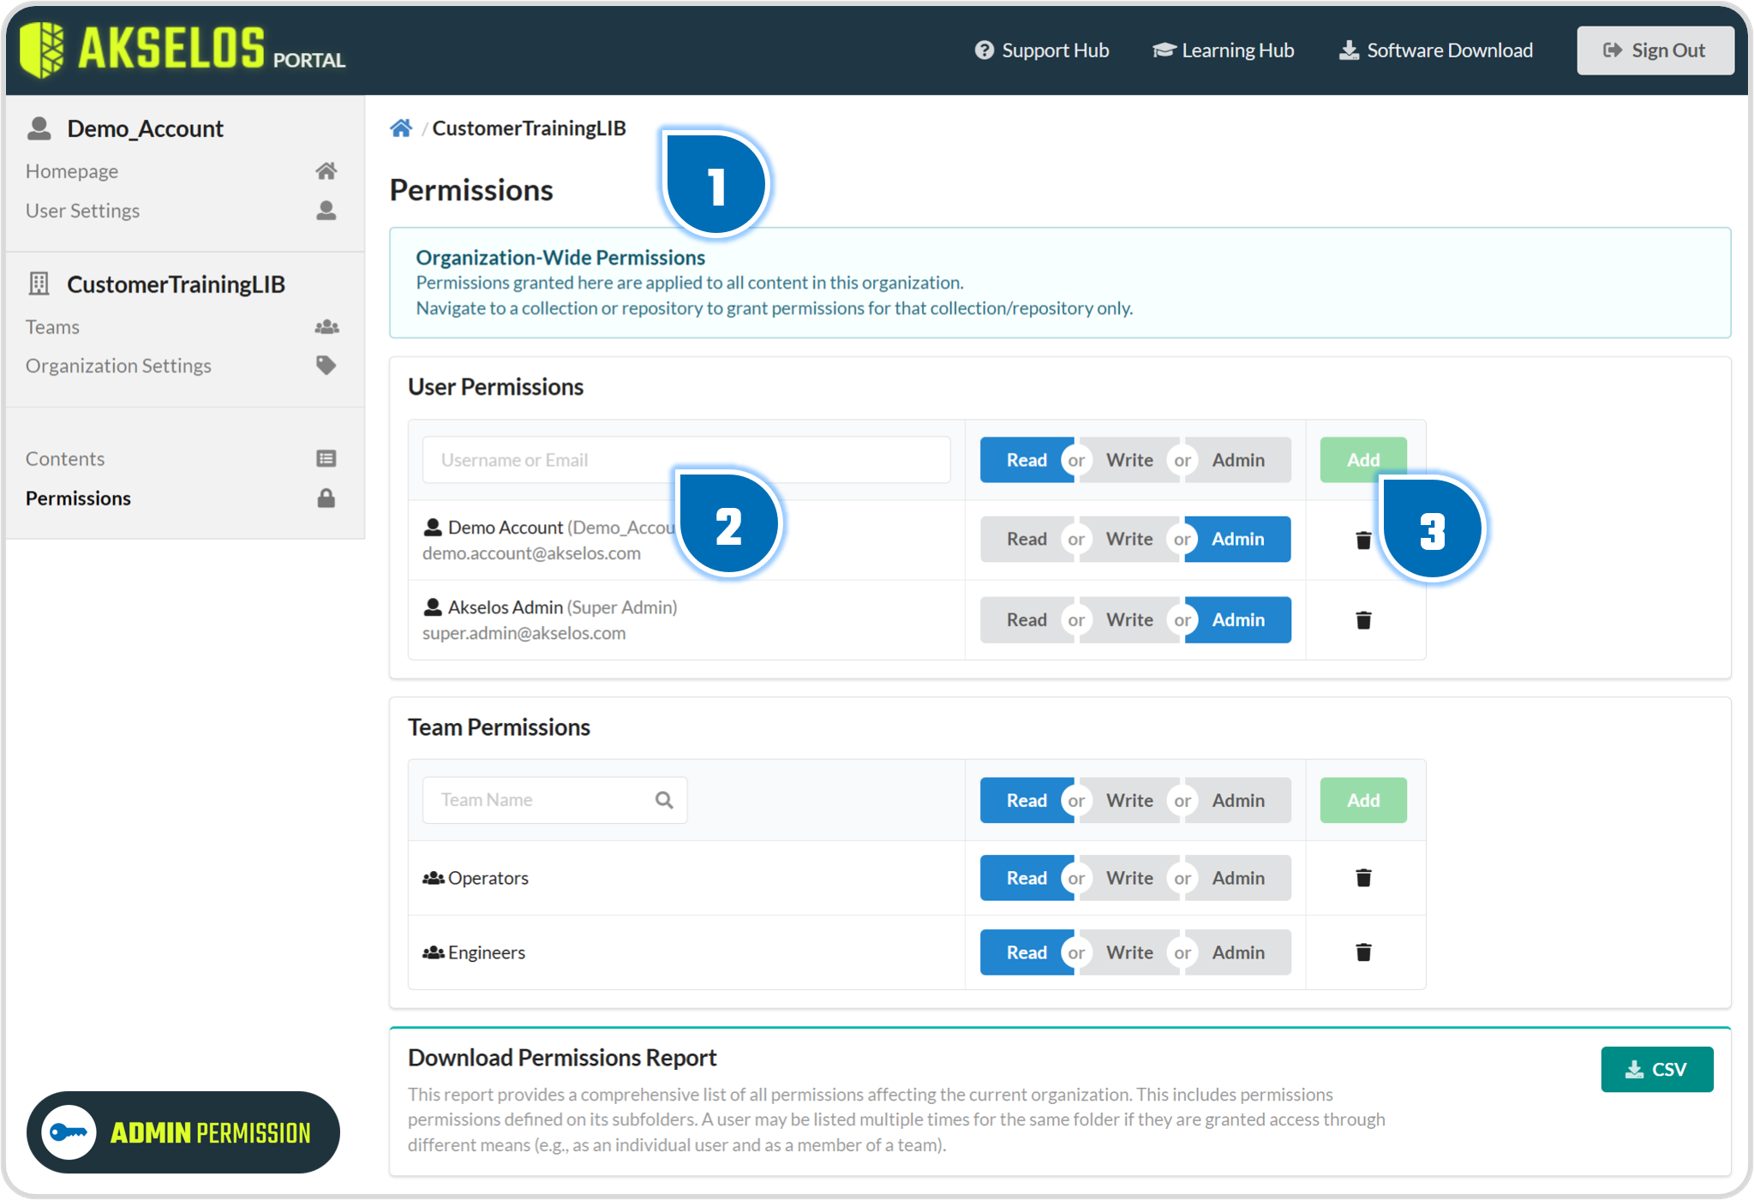
Figure 2. Adding an individual account and selecting its access level
- Open your designated folder, repository, or collection, and go to the Permissions sub-tab.
- In the User Permissions section, enter the username or email of the account in the Username or Email field.
- Select Read, Write, or Admin for the account and click Add. The account appears in the list with the access you set.
Note: To change the access later, select Read, Write, or Admin on the account's row.
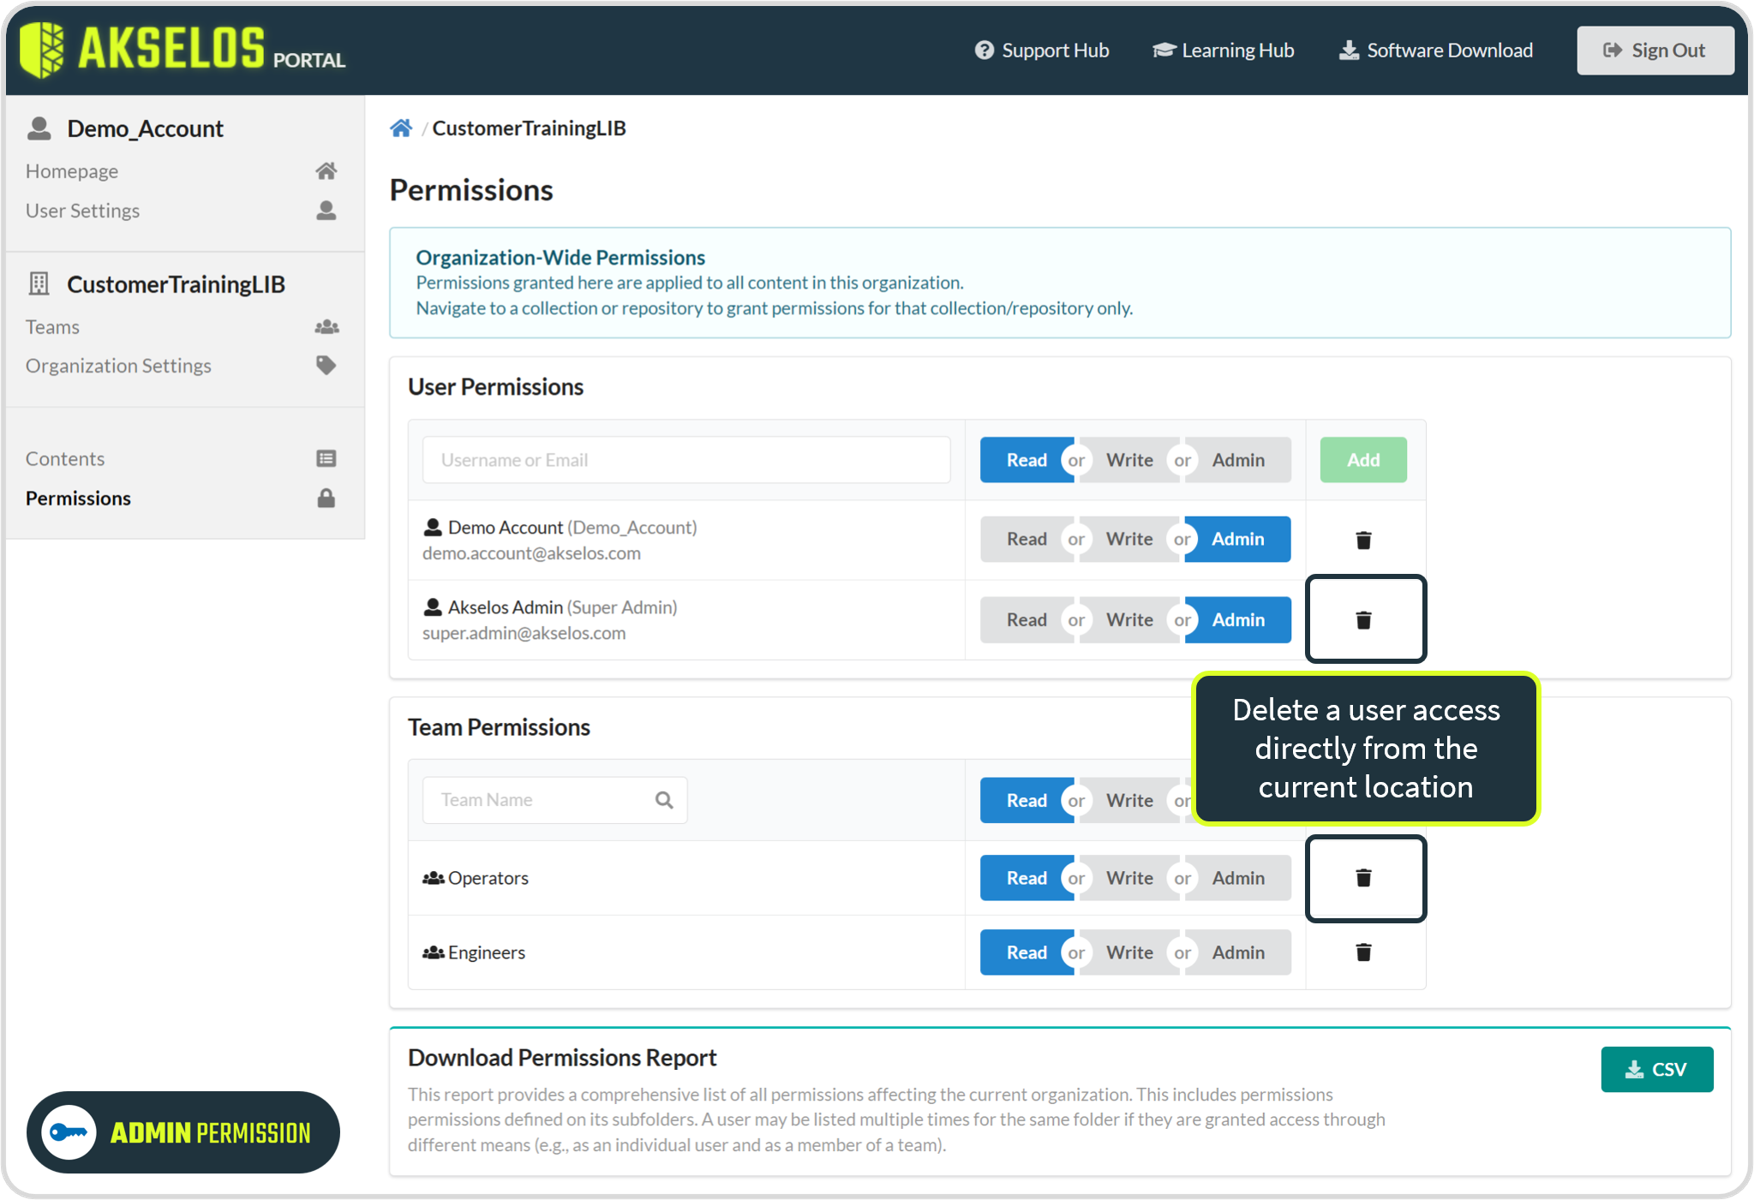
Figure 3. Removing a user's access from the Permissions sub-tab
Note: You can remove a user's access to an organization directly through the Permissions sub-tab. You cannot delete an account entirely from the Akselos Portal. To delete an account from the Portal, contact support at [email protected].
2.3 Setting Permissions for Teams
A team is a group of user accounts that share the same permission. Granting access to a team is a two-stage process: first create the team and add its members, then grant the team access in Permissions.
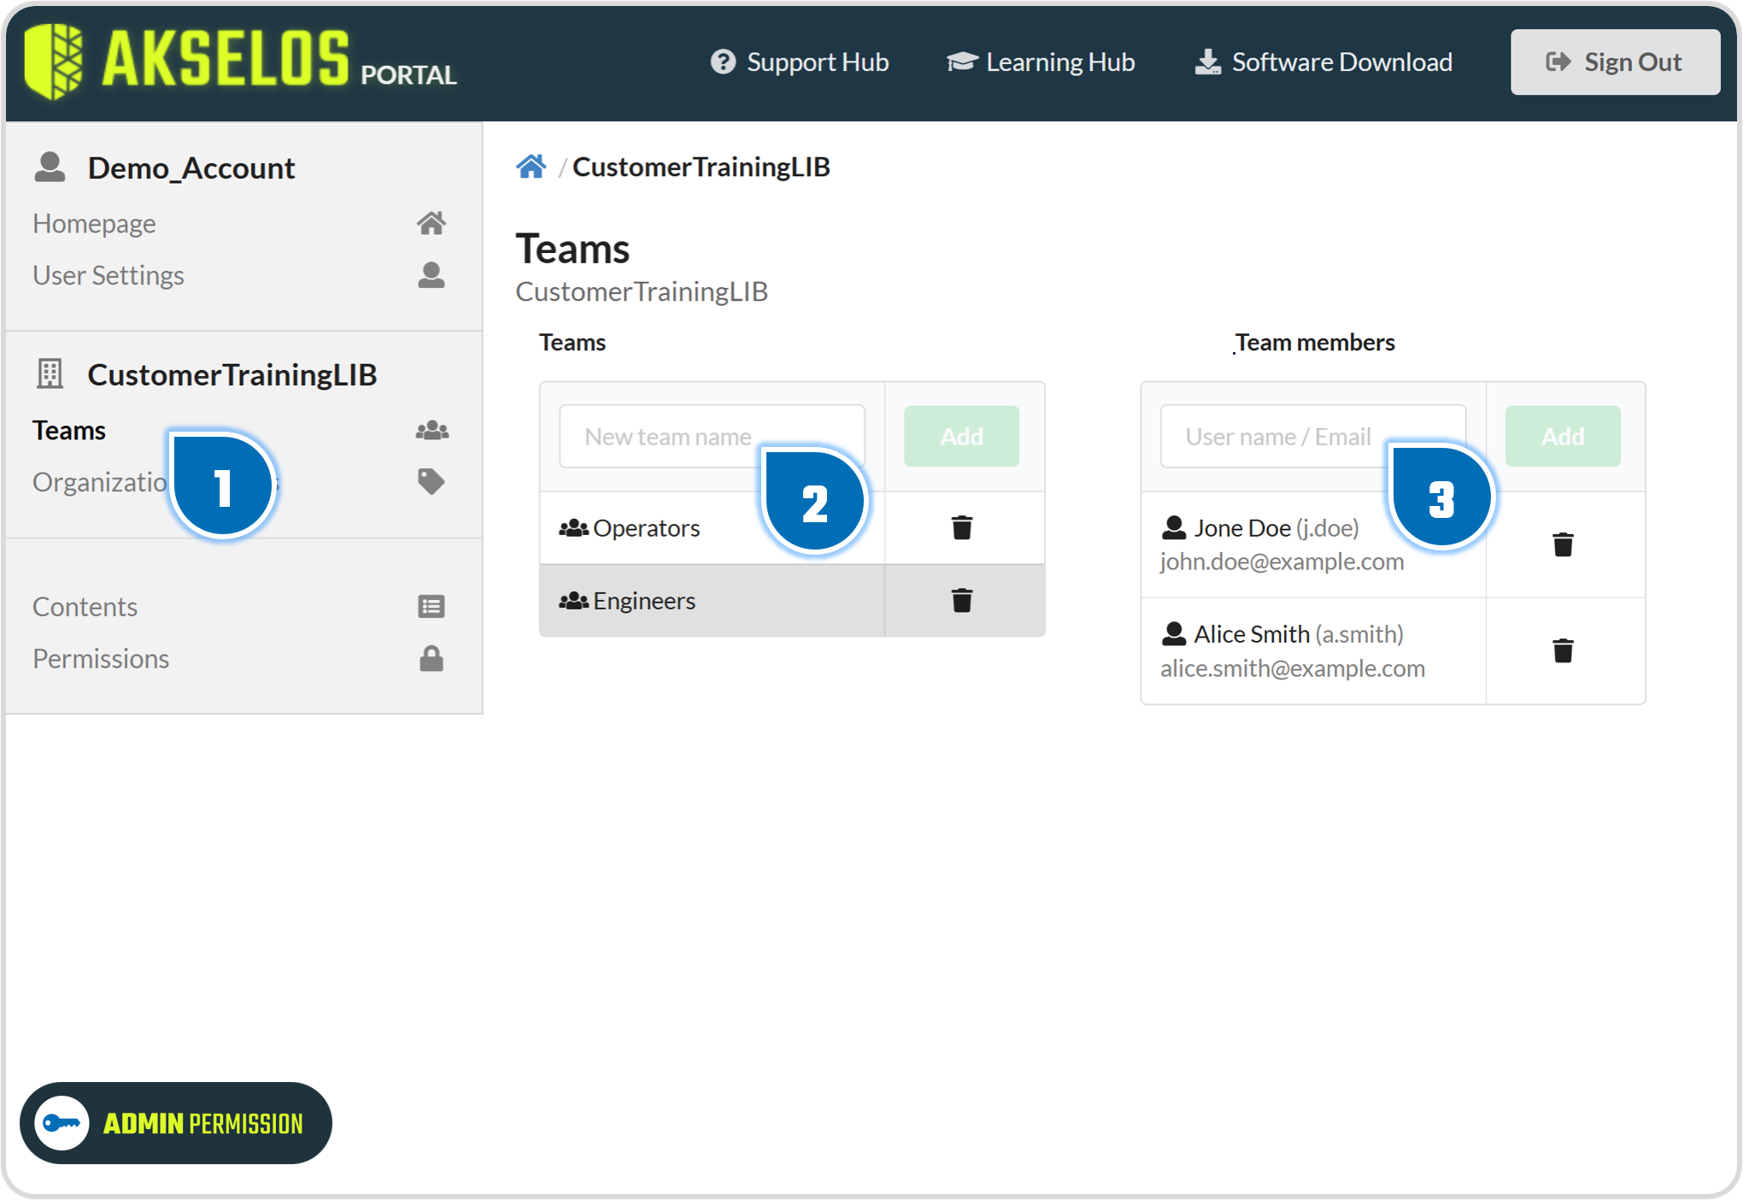
Figure 4. Creating a team and adding members in the Teams sub-tab
To create a team and add members:
- Open the Teams sub-tab.
- Enter a name in the New team name field and click Add. The new team appears in the list.
- Open the team and search for an account to add as a member, using username or email.
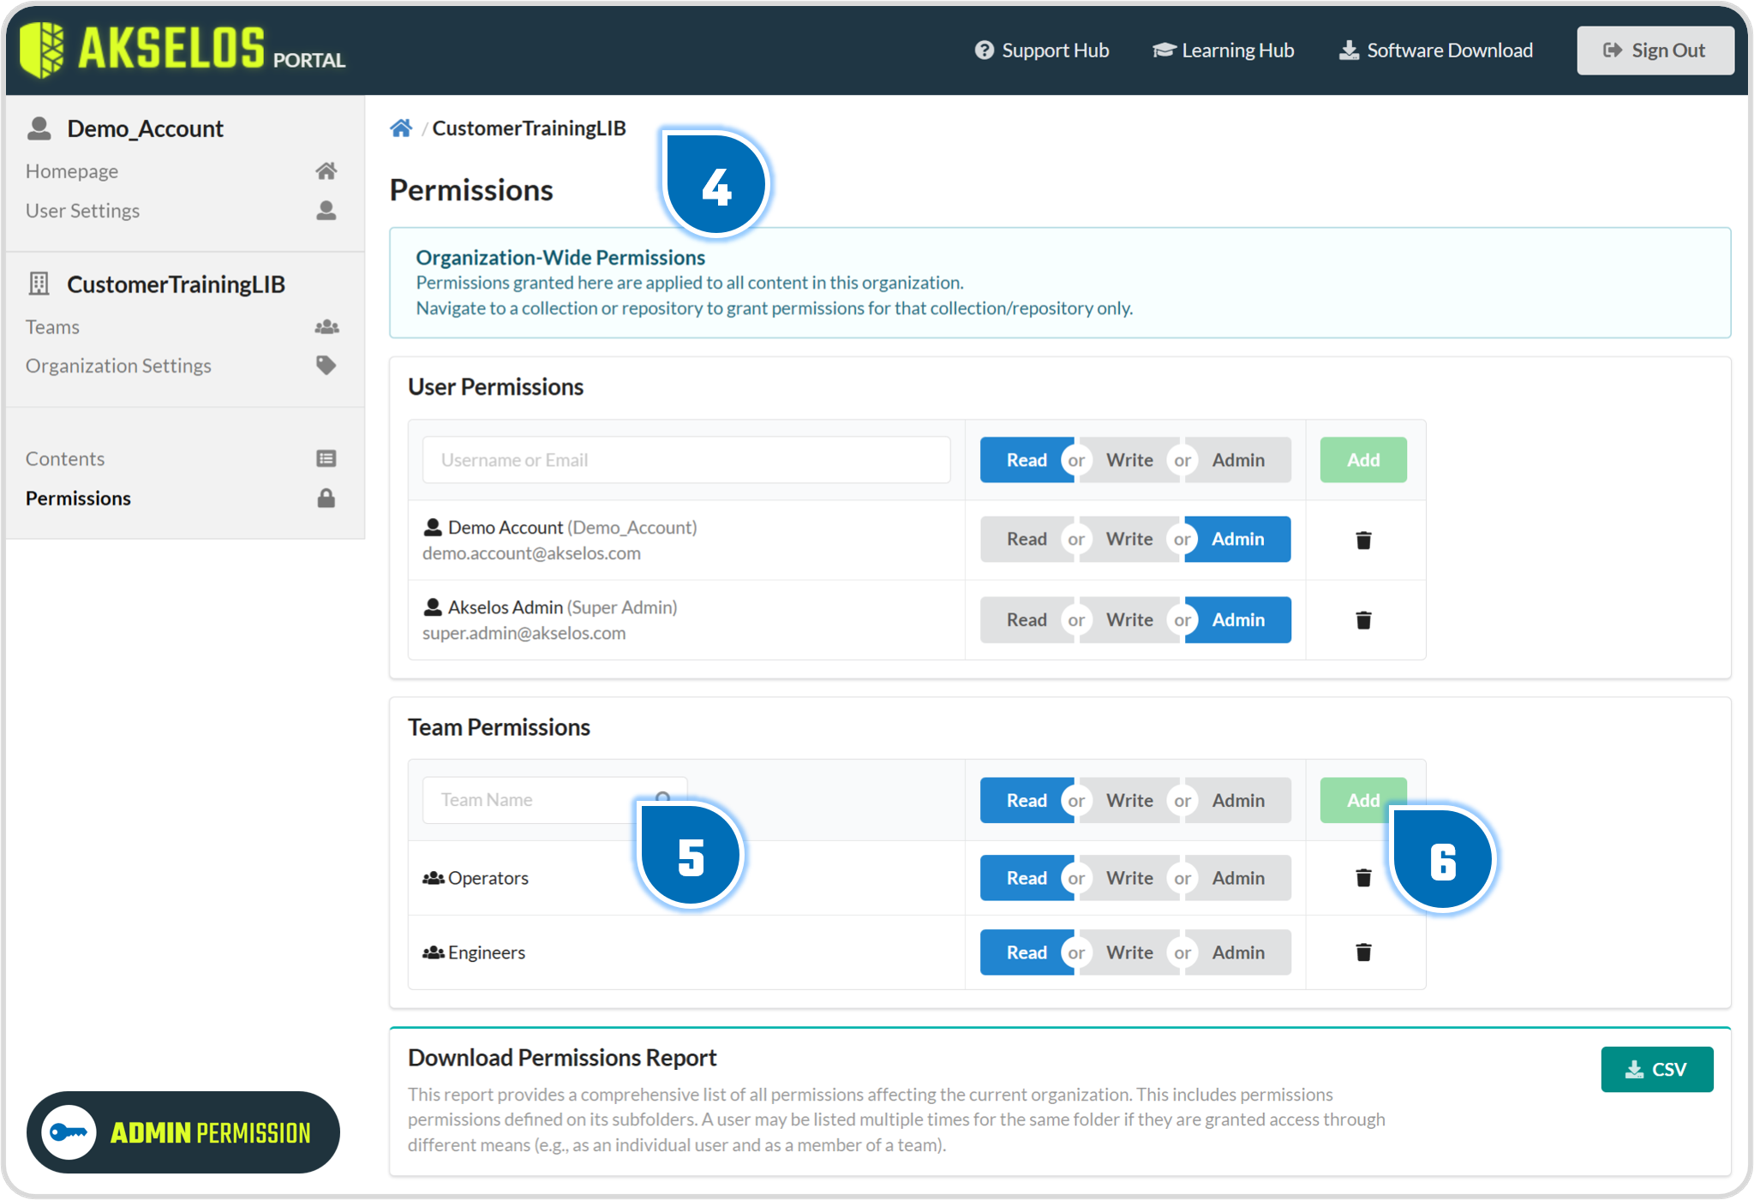
Figure 5. Granting a team access in the Team Permissions section
To grant the team access:
- Go to the designated folder, repository, or collection and open the Permissions sub-tab.
- In the Team Permissions section, enter the team name in the Team Name field.
- Select Read, Write, or Admin for the team, and click Add. Every member of the team now shares the access you set.
A user added to a team after the team has been granted access inherits the team's permission automatically. Where a user's individual permission and team permission overlap on the same location, the highest of the two applies, as described in Section 2.1.
Team permissions also reduce repetitive work: when a person joins or leaves, you change one team membership instead of editing access on every location. The following table compares the two approaches.
| Aspect | Individual (personal) permission | Team permission |
|---|---|---|
| Scope | Applies to one account. | Applies to every member of the team at once. |
| Setting up access | Set the access on each account separately. | Set the access once for the whole team. |
| Adding a person | Grant the access to the new account on each location. | Add the account to the team; it inherits the team's access automatically. |
| Removing a person | Remove the access from each location for that account. | Remove the account from the team; its team access is revoked everywhere at once. |
| Best suited for | One-off or unique access that no one else shares. | Groups of users who need the same access across many locations. |
Table 1. Comparison of individual and team permissions
2.4 Downloading the Permissions Report
The Permissions sub-tab includes a Download Permissions Report option, which exports a CSV file listing all permissions that affect the current organization, including permissions defined on its subfolders. A user may appear more than once for the same folder if they are granted access through more than one route, for example as an individual and as a member of a team.
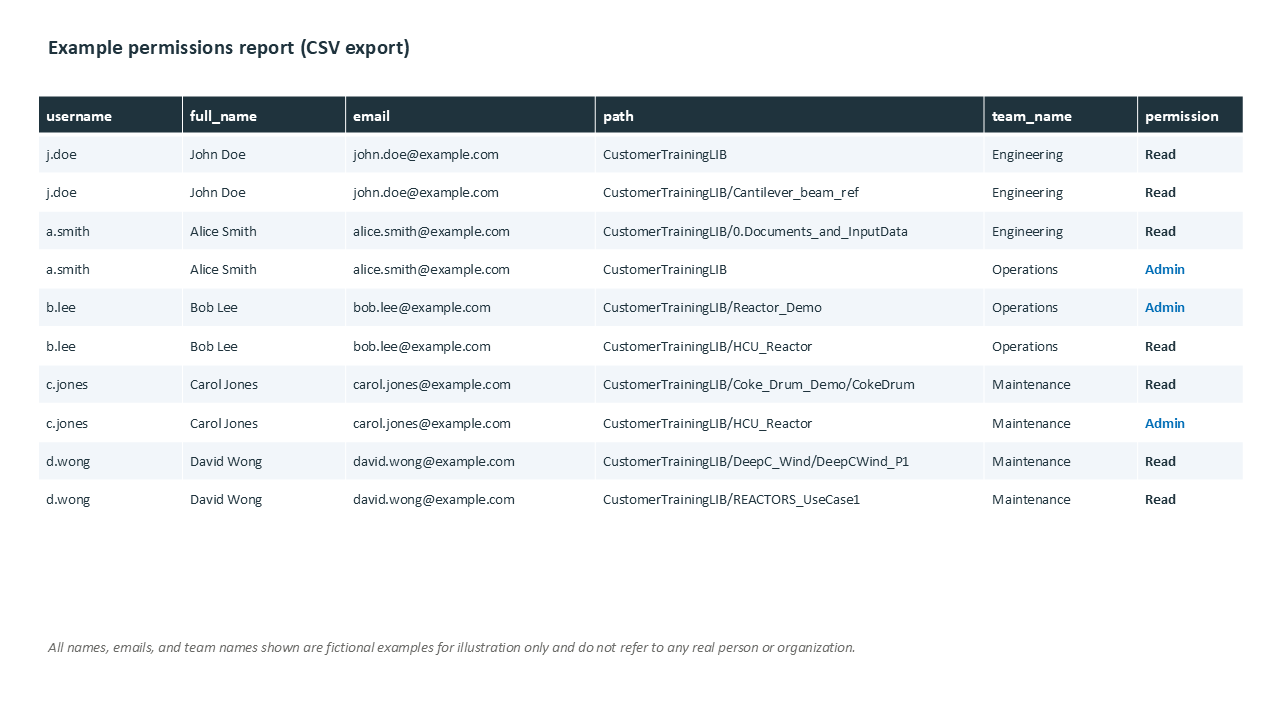
Figure 6. Example of an exported Permissions Report (CSV)
To download the report, click the CSV button in the Download Permissions Report section.
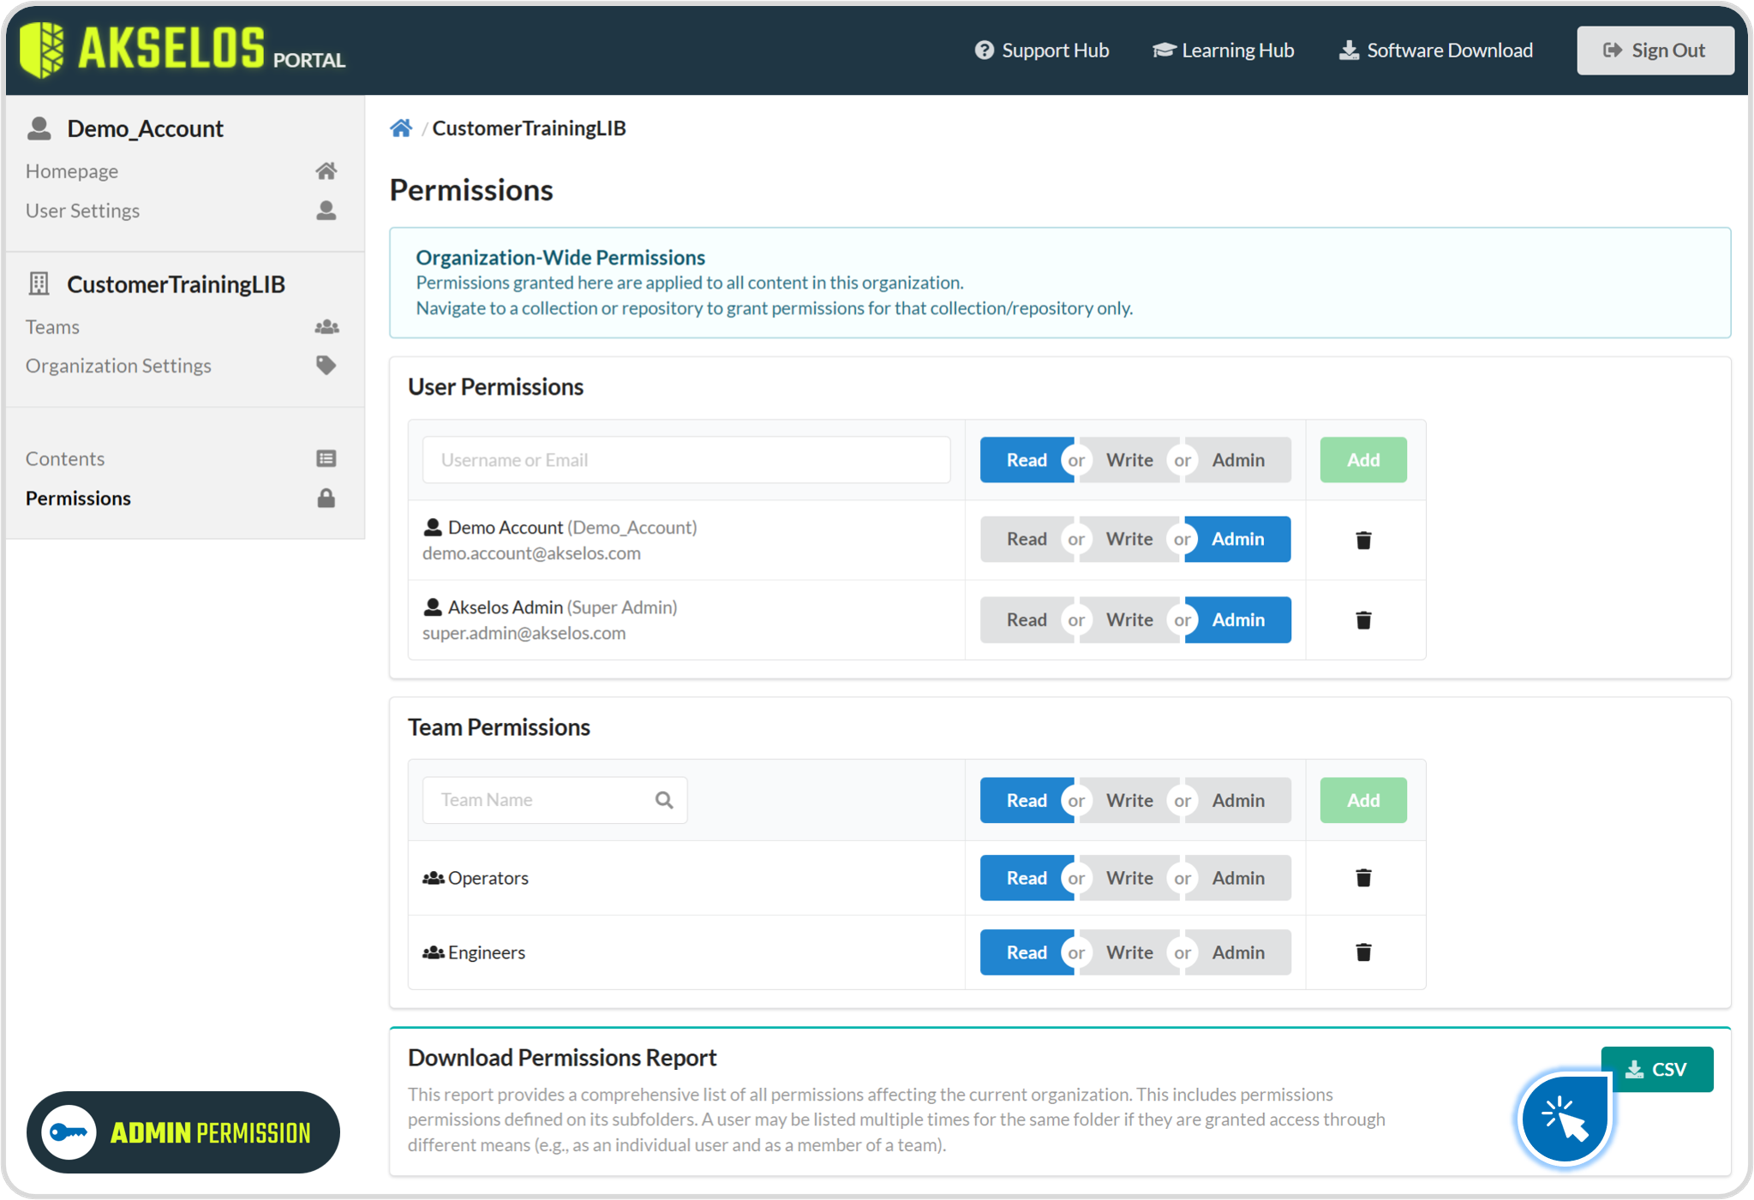
Figure 7. Downloading the Permissions Report as a CSV file
3. Organization Settings
You open Organization Settings to manage organization-wide information and security. Navigate to the organization, then open the Organization Settings sub-tab in the left menu under the organization name. The page presents three areas in order: License Information, Authentication Settings, and Access Logging.
3.1 License Information
The License Information section shows the details of the organization's license. The fields displayed depend on the license, and the example below reflects an Akselos Enterprise HPC license.
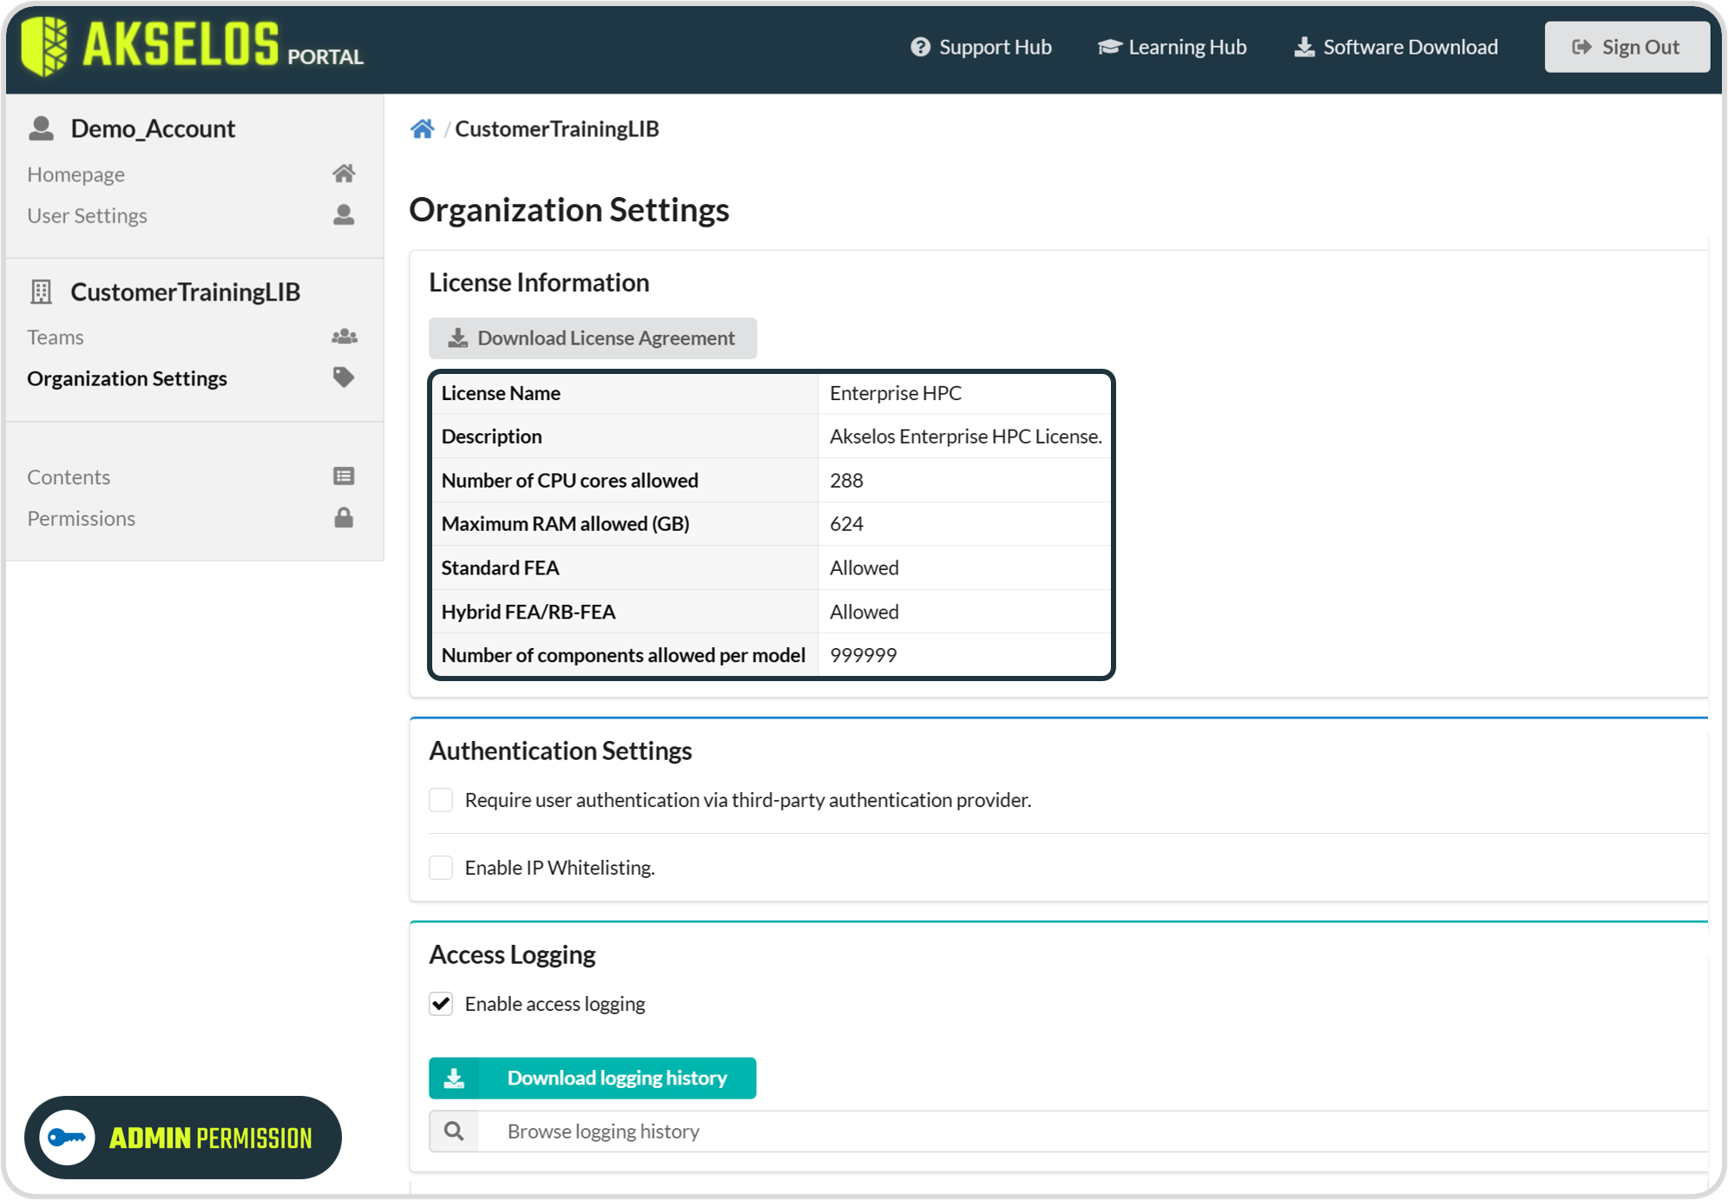
Figure 8. The License Information section
- License Name: the name of the license.
- Description: a description of the license.
- Number of CPU cores allowed: the maximum number of CPU cores available.
- Maximum RAM allowed (GB): the maximum memory available.
- Standard FEA: whether standard finite element analysis is allowed.
- Hybrid FEA/RB-FEA: whether hybrid and reduced basis analysis is allowed.
- Number of components allowed per model: the maximum components in a single model.
Akselos offers two license types, each with a different licensing model. The Akselos Integra license, for operational assets, is asset-based. The Akselos Innovate license, for design work, is token-based. To download a copy of the license agreement, use the Download License Agreement button at the top of the section.
Note: If your organization uses an Akselos Innovate token-based license, the License Information section also shows a Remaining Tokens field, which gives the number of tokens the organization has left. For questions about your license type or how your actions consume tokens, contact support at [email protected].
3.2 Authentication Settings
The Authentication Settings section provides two independent controls, each enabled by its own checkbox.
Require user authentication via third-party authentication provider. This setting requires every member of the organization to sign in using single sign-on through a third-party provider such as Google or Microsoft. Before enabling it, you must be signed in to the Portal using single sign-on, otherwise the setting cannot be activated. Once enabled, all members must sign in with single sign-on. A member who signs in without the single sign-on method can see the organization but cannot access any data within it.
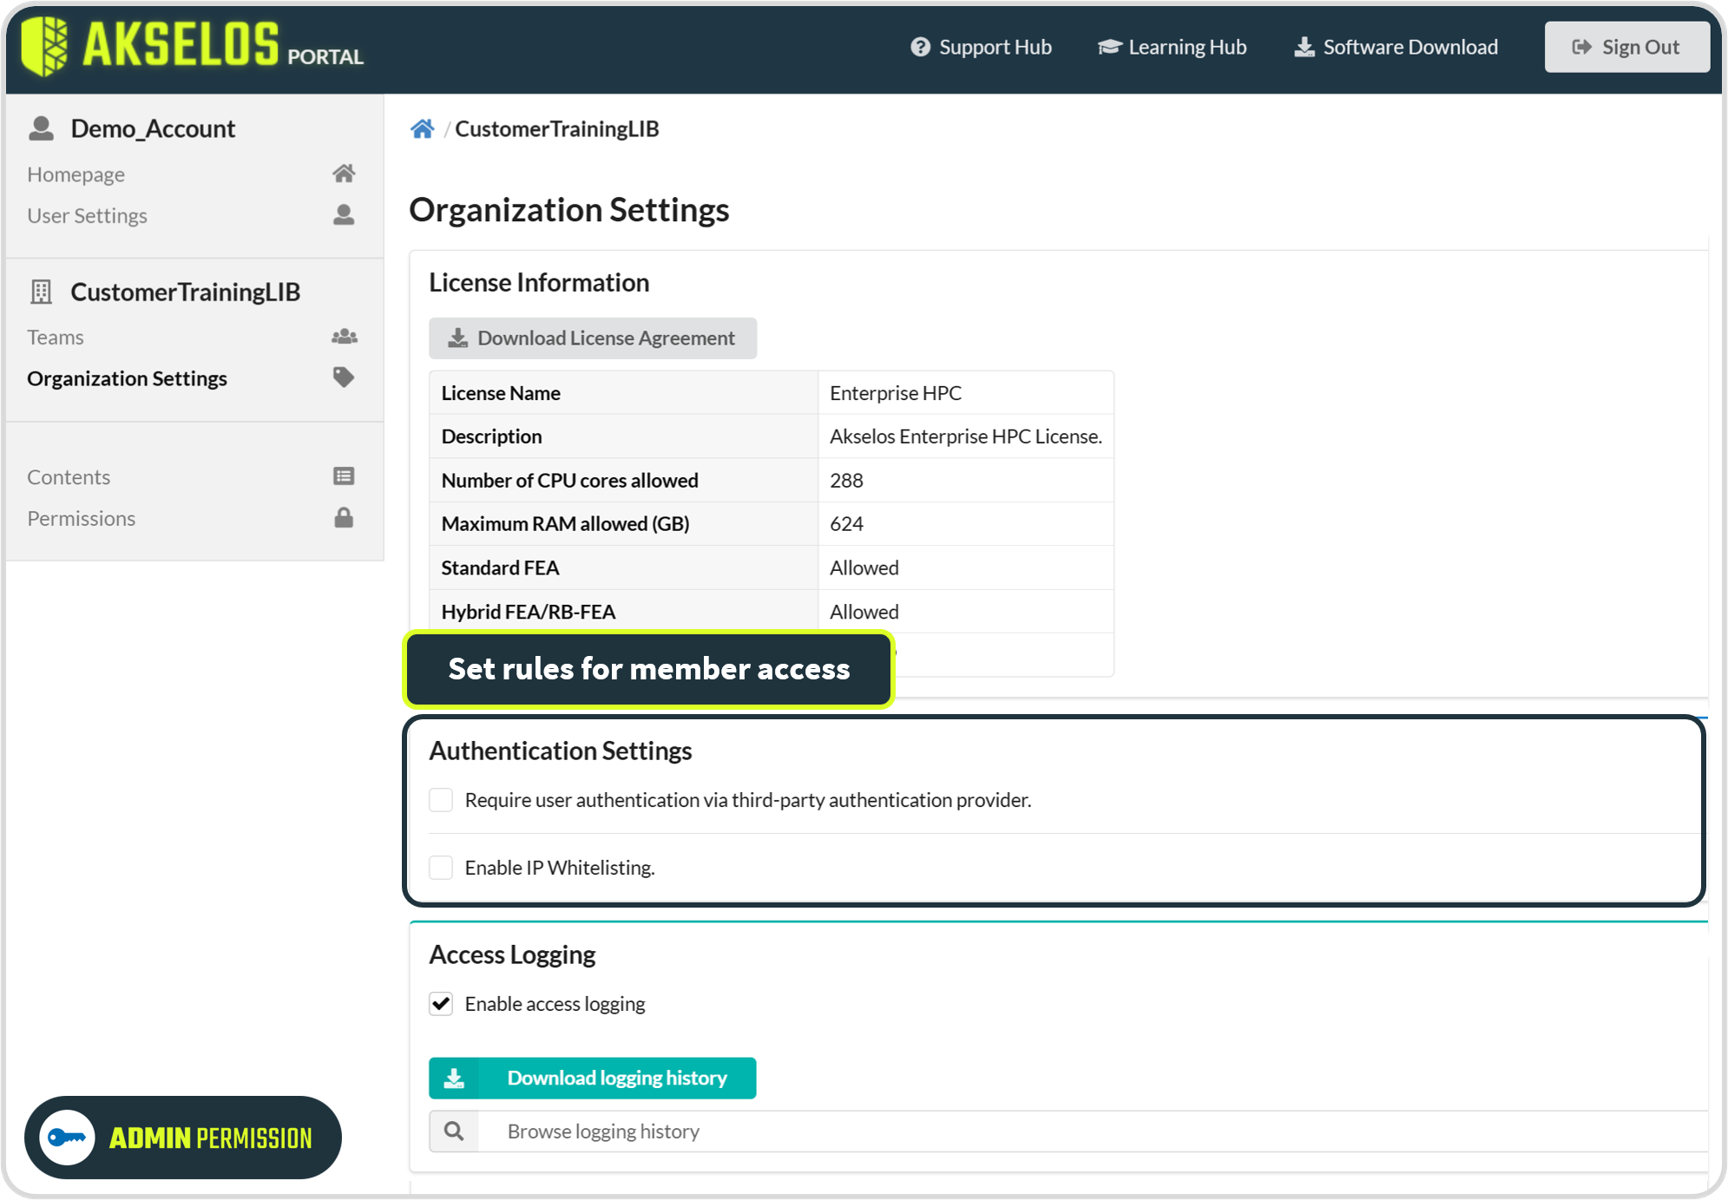
Figure 9. The Authentication Settings controls
Enable IP Whitelisting. This setting restricts access to the organization to a list of trusted IPv4 addresses, so that only connections from approved addresses are allowed. To configure it, enable the checkbox, review the current IP address shown, enter the address to allow, and click Add.
3.3 Access Logging
The Access Logging section records the activity of members within the organization. Each log entry includes the time and date of access in UTC, the IP address, the username, the folder or collection involved, the platform used, and the action taken. When an entry shows a length of time in parentheses, identical entries are suppressed for that period.
To use access logging, enable the Enable access logging checkbox. Logs are available only from the time logging was enabled, so a date selected before that point returns no data. You can browse the logs on the Portal using the Browse logging history field, or export them with the Download logging history button as a CSV file.